Project VersionsSearchTable Of Contents
Previous topicNext topicThis Page |
Volt: Template Engine¶Volt is an ultra-fast and designer friendly templating language written in C for PHP. It provides you a set of helpers to write views in an easy way. Volt is highly integrated with other components of Phalcon, just as you can use it as a stand-alone component in your applications. 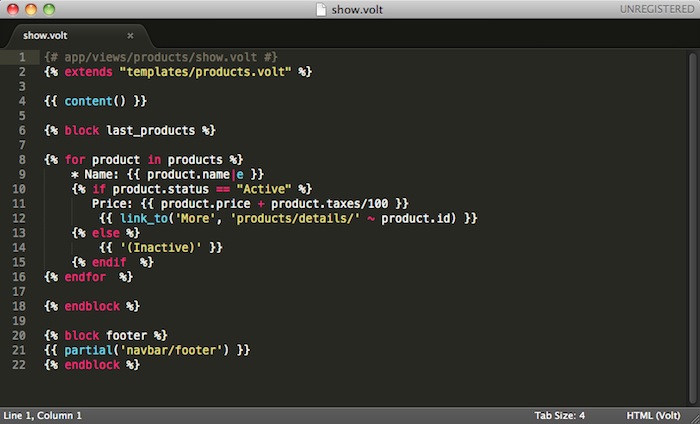
Volt is inspired on Jinja, originally created by Armin Ronacher. Therefore many developers will be in familiar ground using the same syntax they have been using with similar template engines. Volt’s syntax and features have been enhanced with more elements and of course with the performance that developers have been accustomed to while working with Phalcon. Introduction¶Volt views are compiled to pure PHP code, so basically they save the effort of writing PHP code manually: {# app/views/products/show.volt #}
{% block last_products %}
{% for product in products %}
* Name: {{ product.name|e }}
{% if product.status == "Active" %}
Price: {{ product.price + product.taxes/100 }}
{% endif %}
{% endfor %}
{% endblock %}
Activating Volt¶As other template engines, you may register Volt in the view component, using a new extension or reusing the standard .phtml: <?php
//Registering Volt as template engine
$di->set('view', function() {
$view = new \Phalcon\Mvc\View();
$view->setViewsDir('../app/views/');
$view->registerEngines(array(
".volt" => 'Phalcon\Mvc\View\Engine\Volt'
));
return $view;
});
Use the standard ”.phtml” extension: <?php
$view->registerEngines(array(
".phtml" => 'Phalcon\Mvc\View\Engine\Volt'
));
Basic Usage¶A view consists on Volt code, PHP and HTML. A set of special delimiters is available to enter in Volt mode. {% ... %} is used to execute statements such as for-loops or assign values and {{ ... }}, prints the result of an expression to the template. Below is a minimal template that illustrates a few basics: {# app/views/posts/show.phtml #}
<!DOCTYPE html>
<html>
<head>
<title>{{ title }} - A example blog</title>
</head>
<body>
{% if show_navigation %}
<ul id="navigation">
{% for item in menu %}
<li><a href="{{ item.href }}">{{ item.caption }}</a></li>
{% endfor %}
</ul>
{% endif %}
<h1>{{ post.title }}</h1>
<div class="content">
{{ post.content }}
</div>
</body>
</html>
Using Phalcon\Mvc\View::setVar you can pass variables from the controller to the views. In the previous example, three variables were passed to the view: title, menu and post: <?php
class PostsController extends \Phalcon\Mvc\Controller
{
public function showAction()
{
$post = Post::findFirst();
$this->view->setVar("title", $post->title);
$this->view->setVar("post", $post);
$this->view->setVar("menu", Menu::find());
$this->view->setVar("show_navigation", true);
}
}
Variables¶Variables may have attributes, those can be accessed using the syntax: foo.bar. If you are passing arrays, you can access using the curly braces syntax: foo[‘bar’] {{ post.title }}
{{ post['title'] }}
Filters¶Variables can be formatted or modified using filters. The pipe operator | is used to apply filters to variables: {{ post.title|e }}
{{ post.content|striptags }}
{{ name|capitalize|trim }}
The following is the list of available built-in filters in Volt:
Examples: {# e or escape filter #}
{{ "<h1>Hello<h1>"|e }}
{{ "<h1>Hello<h1>"|escape }}
{# trim filter #}
{{ " hello "|trim }}
{# striptags filter #}
{{ "<h1>Hello<h1>"|striptags }}
{# slashes filter #}
{{ "'this is a string'"|slashes }}
{# stripslashes filter #}
{{ "\'this is a string\'"|stripslashes }}
{# capitalize filter #}
{{ "hello"|capitalize }}
{# lower filter #}
{{ "HELLO"|lower }}
{# upper filter #}
{{ "hello"|upper }}
{# length filter #}
{{ "robots"|length }}
{{ [1, 2, 3]|length }}
{# nl2br filter #}
{{ "some\ntext"|nl2br }}
{# sort filter #}
{{ [3, 1, 2]|sort }}
{# keys filter #}
{{ ['first': 1, 'second': 2, 'third': 3]|keys }}
{# json_encode filter #}
{{ robots|json_encode }}
{# json_decode filter #}
{{ '{"one":1,"two":2,"three":3}'|json_decode }}
{# url_encode filter #}
{{ post.permanent_link|url_encode }}
{# convert_encoding filter #}
{{ "désolé"|convert_encoding('utf8', 'latin1') }}
Comments¶Comments may also be added to a template using the {# ... #} delimiters. All text inside them is just ignored in the final output: {# note: this is a comment
{% set price = 100; %}
#}
List of Control Structures¶Volt provides a set of basic but powerful control structures for use in templates: For¶Loop over each item in a sequence. The following example shows how to traverse a set of “robots” and print his/her name: <h1>Robots</h1>
<ul>
{% for robot in robots %}
<li>{{ robot.name|e }}</li>
{% endfor %}
</ul>
for-loops can also be nested: <h1>Robots</h1>
{% for robot in robots %}
{% for part in robot.parts %}
Robot: {{ robot.name|e }} Part: {{ part.name|e }} <br/>
{% endfor %}
{% endfor %}
You can get the element “keys” as in the PHP counterpart using the following syntax: {% set numbers = ['one': 1, 'two': 2, 'three': 3] %}
{% for name, value in numbers %}
Name: {{ name }} Value: {{ value }}
{% endfor %}
An “if” evaluation can be optionally set: {% set numbers = ['one': 1, 'two': 2, 'three': 3] %}
{% for value in numbers if value < 2 %}
Name: {{ name }} Value: {{ value }}
{% endfor %}
{% for name, value in numbers if name != 'two' %}
Name: {{ name }} Value: {{ value }}
{% endfor %}
If an ‘else’ is defined inside the ‘for’, it will be executed if the expression in the iterator result in zero iterations: <h1>Robots</h1>
{% for robot in robots %}
Robot: {{ robot.name|e }} Part: {{ part.name|e }} <br/>
{% else %}
There are no robots to show
{% endfor %}
Loop Controls¶The ‘break’ and ‘continue’ statements can be used to exit from a loop or force an iteration in the current block: {# skip the even robots #}
{% for index, robot in robots %}
{% if index is even %}
{% continue %}
{% endif %}
...
{% endfor %}
{# exit the foreach on the first even robot #}
{% for index, robot in robots %}
    {% if index is even %}
        {% break %}
    {% endif %}
    ...
{% endfor %}
If¶As PHP, an “if” statement checks if an expression is evaluated as true or false: <h1>Cyborg Robots</h1>
<ul>
{% for robot in robots %}
{% if robot.type == "cyborg" %}
<li>{{ robot.name|e }}</li>
{% endif %}
{% endfor %}
</ul>
The else clause is also supported: <h1>Robots</h1>
<ul>
{% for robot in robots %}
{% if robot.type == "cyborg" %}
<li>{{ robot.name|e }}</li>
{% else %}
<li>{{ robot.name|e }} (not a cyborg)</li>
{% endif %}
{% endfor %}
</ul>
The ‘elseif’ control flow structure can be used together with if to emulate a ‘switch’ block: {% if robot.type == "cyborg" %}
Robot is a cyborg
{% elseif robot.type == "virtual" %}
Robot is virtual
{% elseif robot.type == "mechanical" %}
Robot is mechanical
{% endif %}
Loop Context¶A special variable is available inside ‘for’ loops providing you information about
{% for robot in robots %}
    {% if loop.first %}
            <table>
            <tr>
            <th>#</th>
                    <th>Id</th>
                    <th>Name</th>
            </tr>
    {% endif %}
            <tr>
            <td>{{ loop.index }}</td>
                    <td>{{ robot.id }}</td>
                    <td>{{ robot.name }}</td>
            </tr>
    {% if loop.last %}
            </table>
    {% endif %}
{% endfor %}
Assignments¶Variables may be changed in a template using the instruction “set”: {% set fruits = ['Apple', 'Banana', 'Orange'] %}
{% set name = robot.name %}
Expressions¶Volt provides a basic set of expression support, including literals and common operators. A expression can be evaluated and printed using the ‘{{‘ and ‘}}’ delimiters: {{ (1 + 1) * 2 }}
If an expression needs to be evaluated without be printed the ‘do’ statement can be used: {% do (1 + 1) * 2 %}
Literals¶The following literals are supported:
Arrays¶Whether you’re using PHP 5.3 or 5.4, you can create arrays by enclosing a list of values in square brackets: {# Simple array #}
{{ ['Apple', 'Banana', 'Orange'] }}
{# Other simple array #}
{{ ['Apple', 1, 2.5, false, null] }}
{# Multi-Dimensional array #}
{{ [[1, 2], [3, 4], [5, 6]] }}
{# Hash-style array #}
{{ ['first': 1, 'second': 4/2, 'third': '3'] }}
Math¶You may make calculations in templates using the following operators:
Comparisions¶The following comparision operators are available:
Logic¶Logic operators are useful in the “if” expression evaluation to combine multiple tests:
Other Operators¶Additional operators seen the following operators are available:
The following example shows how to use operators: {% set robots = ['Voltron', 'Astro Boy', 'Terminator', 'C3PO'] %}
{% for index in 0..robots|length %}
{% if robots[index] is defined %}
{{ "Name: " ~ robots[index] }}
{% endif %}
{% endfor %}
Tests¶Tests can be used to test if a variable has a valid expected value. The operator “is” is used to perform the tests: {% set robots = ['1': 'Voltron', '2': 'Astro Boy', '3': 'Terminator', '4': 'C3PO'] %}
{% for position, name in robots %}
{% if position is odd %}
{{ value }}
{% endif %}
{% endfor %}
The following built-in tests are available in Volt:
More examples: {% if robot is empty %}
The robot is null or isn't defined
{% endif }
{% for key, name in [1: 'Voltron', 2: 'Astroy Boy', 3: 'Bender'] %}
{% if key is even %}
{{ name }}
{% endif }
{% endfor %}
{% for key, name in [1: 'Voltron', 2: 'Astroy Boy', 3: 'Bender'] %}
{% if key is odd %}
{{ name }}
{% endif }
{% endfor %}
{% for key, name in [1: 'Voltron', 2: 'Astroy Boy', 'third': 'Bender'] %}
{% if key is numeric %}
{{ name }}
{% endif }
{% endfor %}
{% set robots = [1: 'Voltron', 2: 'Astroy Boy'] %}
{% if robots is iterable %}
{% for robot in robots %}
...
{% endfor %}
{% endif %}
Using Tag Helpers¶Volt is highly integrated with Phalcon\Tag, so it’s easy to use the helpers provided by that component in a Volt template: {{ javascript_include("js/jquery.js") }}
{{ form('products/save', 'method': 'post') }}
<label>Name</label>
{{ text_field("name", "size": 32) }}
<label>Type</label>
{{ select("type", productTypes, 'using': ['id', 'name']) }}
{{ submit_button('Send') }}
</form>
The following PHP is generated: <?php echo Phalcon\Tag::javascriptInclude("js/jquery.js") ?>
<?php echo Phalcon\Tag::form(array('products/save', 'method' => 'post')); ?>
<label>Name</label>
<?php echo Phalcon\Tag::textField(array('name', 'size' => 32)); ?>
<label>Type</label>
<?php echo Phalcon\Tag::select(array('type', $productTypes, 'using' => array('id', 'name'))); ?>
<?php echo Phalcon\Tag::submitButton('Send'); ?>
</form>
To call a PhalconTag helper, you only need to call an uncamelized version of the method:
Functions¶The following built-in functions are available in Volt:
View Integration¶Also, Volt is integrated with Phalcon\Mvc\View, you can play with the view hierarchy and include partials as well: {{ content() }}
<div id="footer">{{ partial("partials/footer") }}</div>
A partial is included in runtime, Volt also provides “include”, this compiles the content of a view and returns its contents as part of the view which was included: <div id="footer">{% include "partials/footer" %}</div>
Partial vs Include¶Keep the following points in mind when choosing to use the “partial” function or “include”:
Template Inheritance¶With template inheritance you can create base templates that can be extended by others templates allowing to reuse code. A base template define blocks than can be overridden by a child template. Let’s pretend that we have the following base template: {# templates/base.volt #}
<!DOCTYPE html>
<html>
<head>
{% block head %}
<link rel="stylesheet" href="style.css" />
{% endblock %}
<title>{% block title %}{% endblock %} - My Webpage</title>
</head>
<body>
<div id="content">{% block content %}{% endblock %}</div>
<div id="footer">
{% block footer %}© Copyright 2012, All rights reserved.{% endblock %}
</div>
</body>
</html>
From other template we could extend the base template replacing the blocks: {% extends "templates/base.volt" %}
{% block title %}Index{% endblock %}
{% block head %}<style type="text/css">.important { color: #336699; }</style>{% endblock %}
{% block content %}
<h1>Index</h1>
<p class="important">Welcome on my awesome homepage.</p>
{% endblock %}
Not all blocks must be replaced at a child template, only those that are needed. The final output produced will be the following: <!DOCTYPE html>
<html>
<head>
<style type="text/css">.important { color: #336699; }</style>
<title>Index - My Webpage</title>
</head>
<body>
<div id="content">
<h1>Index</h1>
<p class="important">Welcome on my awesome homepage.</p>
</div>
<div id="footer">
© Copyright 2012, All rights reserved.
</div>
</body>
</html>
Multiple Inheritance¶Extended templates can extend other templates. The following example illustrates this: {# main.volt #}
<!DOCTYPE html>
<html>
<head>
<title>Title</title>
</head>
<body>
{% block content %}{% endblock %}
</body>
</html>
Template “layout.volt” extends “main.volt” {# layout.volt #}
{% extends "main.volt" %}
{% block content %}
<h1>Table of contents</h1>
{% endblock %}
Finally a view that extends “layout.volt”: {# index.volt #}
{% extends "layout.volt" %}
{% block content %}
{{ super() }}
<ul>
<li>Some option</li>
<li>Some other option</li>
</ul>
{% endblock %}
Rendering “index.volt” produces: <!DOCTYPE html>
<html>
<head>
<title>Title</title>
</head>
<body>
<h1>Table of contents</h1>
<ul>
<li>Some option</li>
<li>Some other option</li>
</ul>
</body>
</html>
Note the call to the function “super()”. With that function it’s possible to render the contents of the parent block. As partials, the path set to “extends” is a relative path under the current views directory (i.e. app/views/).
Autoescape mode¶You can enable auto-escaping of all variables printed in a block using the autoescape mode: Manually escaped: {{ robot.name|e }}
{% autoescape true %}
Autoescaped: {{ robot.name }}
{% autoescape false %}
No Autoescaped: {{ robot.name }}
{% endautoescape %}
{% endautoescape %}
Setting up the Volt Engine¶Volt can be configured to alter its default behavior, the following example explain how to do that: <?php
//Register Volt as a service
$di->set('voltService', function($view, $di) {
$volt = new \Phalcon\Mvc\View\Engine\Volt($view, $di);
$volt->setOptions(array(
"compiledPath" => "../app/compiled-templates/",
"compiledExtension" => ".compiled"
));
return $volt;
});
//Register Volt as template engine
$di->set('view', function() {
$view = new \Phalcon\Mvc\View();
$view->setViewsDir('../app/views/');
$view->registerEngines(array(
".volt" => 'voltService'
));
return $view;
});
If you do not want to reuse Volt as a service you can pass an anonymous function to register the engine instead of a service name: <?php
//Register Volt as template engine with an anonymous function
$di->set('view', function() {
$view = new \Phalcon\Mvc\View();
$view->setViewsDir('../app/views/');
$view->registerEngines(array(
".volt" => function($view, $di) {
$volt = new \Phalcon\Mvc\View\Engine\Volt($view, $di);
//set some options here
return $volt;
}
));
return $view;
});
The following options are available in Volt:
Extending Volt¶Unlike other template engines, Volt itself is not required to run the compiled templates. Once the templates are compiled there is no dependence on Volt. With performance independence in mind, Volt only acts as a compiler for PHP templates. The Volt compiler allow you to extend it adding more functions, tests or filters to the existing ones. Functions¶Functions act as normal PHP functions, a valid string name is required as function name. Functions can be added using two strategies, returning a simple string or using an anonymous function. Always is required that the chosen strategy returns a valid PHP string expression: <?php
$volt = new \Phalcon\Mvc\View\Engine\Volt($view, $di);
$compiler = $volt->getCompiler();
//This binds the function 'shuffle' in Volt to the PHP function 'str_shuffle'
$compiler->addFunction('shuffle', 'str_shuffle');
Register the function with an anonymous function. This case we use $resolvedArgs to pass the arguments exactly as were passed in the arguments: <?php
$compiler->addFunction('widget', function($resolvedArgs, $exprArgs) {
return 'MyLibrary\Widgets::get('.$resolvedArgs.')';
});
Treat the arguments independently and unresolved: <?php
$compiler->addFunction('repeat', function($resolvedArgs, $exprArgs) use ($compiler) {
//Resolve the first argument
$firstArgument = $compiler->expression($exprArgs[0]['expr']);
//Checks if the second argument was passed
if (isset($exprArgs[1])) {
$secondArgument = $compiler->expression($exprArgs[1]['expr']);
} else {
//Use '10' as default
$secondArgument = '10';
}
return 'str_repeat('.$firstArgument.', '.$secondArgument.')';
});
Generate the code based on some function availability: <?php
$compiler->addFunction('include_text', function($resolvedArgs, $exprArgs) {
if (function_exists('mb_stripos')) {
return 'mb_stripos('.$resolvedArgs.')';
} else {
return 'stripos('.$resolvedArgs.')';
}
});
Built-in functions can be overrided adding a function with its name: <?php
//Replace built-in function dump
$compiler->addFunction('dump', 'print_r');
Filters¶A filter has the following form in a template: leftExpr|name(optional-args). Adding new filters is similar as seen with the functions: <?php
//This creates a filter 'hash' that uses the PHP function 'md5'
$compiler->addFilter('hash', 'md5');
<?php

$compiler->addFilter('int', function($resolvedArgs, $exprArgs) {
    return 'intval('.$resolvedArgs.')';
});
Built-in filters can be overrided adding a function with its name: <?php
//Replace built-in filter 'capitalize'
$compiler->addFilter('capitalize', 'lcfirst');
Caching view fragments¶With Volt it’s easy cache view fragments. This caching improves performance preventing that the contents of a block is executed by PHP each time the view is displayed: {% cache "sidebar" %}
<!-- generate this content is slow so we are going to cache it -->
{% endcache %}
Setting an specific number of seconds: {# cache the sidebar by 1 hour #}
{% cache "sidebar" 3600 %}
<!-- generate this content is slow so we are going to cache it -->
{% endcache %}
Any valid expression can be used as cache key: {% cache ("article-" ~ post.id) 3600 %}
<h1>{{ post.title }}</h1>
<p>{{ post.content }}</p>
{% endcache %}
The caching is done by the Phalcon\Cache component via the view component. Learn more about how this integration works in the section “Caching View Fragments”. Inject Services into a Template¶If a service container (DI) is available for Volt, you can use the services by only accessing the name of the service in the template: {# Inject the 'flash' service #}
<div id="messages">{{ flash.output() }}</div>
{# Inject the 'security' service #}
<input type="hidden" name="token" value="{{ security.getToken() }}">
Stand-alone component¶Using Volt in a stand-alone mode can be demonstrated below: <?php
//Create a compiler
$compiler = new \Phalcon\Mvc\View\Engine\Volt\Compiler();
//Optionally add some options
$compiler->setOptions(array(
//...
));
//Compile a template string returning PHP code
echo $compiler->compileString('{{ "hello" }}');
//Compile a template in a file specifying the destination file
$compiler->compileFile('layouts/main.volt', 'cache/layouts/main.volt.php');
//Compile a template in a file based on the options passed to the compiler
$compiler->compile('layouts/main.volt');
//Require the compiled templated (optional)
require $compiler->getCompiledPath();
External Resources
|